Plain yogurt
2qts. goats milk
2 tsp. plain cultured yogurt
1c. powdered milk
clean and sterlized wide mouth canning jars.( pint or qt.)
Warm milk to 115F Stir in powdered milk( if desired, it's supposed help thicken it) Add 2 tsp. yogurt, mix well and pour into jars. Place filled jars into a roaster or kettle, fill with hot tap water up to the neck of the jars, cover and let it work. If the yogurt isn't setting up, change out the water and add more hot tap water until thickness you desire.( I did not do this, instead I poured the yogurt into a casserole dish, with lid and wrapped it in a thick towel. After about an hour it was still to thin, so placed the oven on 200F when warm turned it off and placed the towel and dish in the oven ( remember to turn your oven OFF first) This yogurt is milder than cows milk yogurt( less of a bite, if you know what I mean) and REALLY creamy, Yummm, Yummmm Fruit smoothies on tap for dessert tonight! :o)
I hope everyone give this a try, whether with goat milk or cows milk( not sure if you can use store bought to do this or not! Such a great and healthy treat and handy to have around in case of animal stool issues or upset rumens.
Showing posts with label Recipe. Show all posts
Showing posts with label Recipe. Show all posts
Thursday, April 14, 2011


Wednesday, February 9, 2011
What cures a windy, blustry day?
Well of course baking! Yesterday while it was cold and windy we made a pot of Ham and Bean Soup, Cornbread Muffins and Marble Cake with Carmel Icing. This cake recipe was something new and I thought the Carmel icing( taken from another recipe) would top it off beautifully!
 Marble Cake
3/4 c. lard/ shortening
1-1/2 c. sugar ( I cut this back to 3/4c.)
1-1/2 tsp. soda
1-1/2 tsp baking powder
1/2 tsp salt
2-1/2 c. flour
1-1/2c. sour milk or buttermilk
1-1/2tsp. vanilla
2 unbeaten eggs
Work the lard until soft, add sugar mixing well. Add remaining ingredients;except eggs When mixed well add eggs and blend in. Pour batter into a well greased pan( we used a bundt pan), except retain approx. 1/4 of the batter in the bowl. Mix the following into the bowl and remaining batter
1Tbsp. sugar
1/4 tsp, soda
2Tbsp. cocoa powder( carob powder works well too)
2Tbsp. hot water
Mix well and pour over the batter in the pan. Take a knife and zig zag through the batter to give it a marbled effect. Bake at 350F for 30-40 minutes.
Carmel Icing
1 stick butter( no substitutes, sorry)
1c. brown sugar
1/4c. cream
1 tsp vanilla
powdered sugar
In a heavy sauce pot bring the butter and sugar to a boil, stirring constantly to avoid burning, for 2 minutes. Remove from heat; add cream and mix well, return to boil( stirring) for 1 more minute, let cool. Add vanilla and enough powdered sugar to spreadable consistency .

3/4 c. lard/ shortening
1-1/2 c. sugar ( I cut this back to 3/4c.)
1-1/2 tsp. soda
1-1/2 tsp baking powder
1/2 tsp salt
2-1/2 c. flour
1-1/2c. sour milk or buttermilk
1-1/2tsp. vanilla
2 unbeaten eggs
Work the lard until soft, add sugar mixing well. Add remaining ingredients;except eggs When mixed well add eggs and blend in. Pour batter into a well greased pan( we used a bundt pan), except retain approx. 1/4 of the batter in the bowl. Mix the following into the bowl and remaining batter
1Tbsp. sugar
1/4 tsp, soda
2Tbsp. cocoa powder( carob powder works well too)
2Tbsp. hot water
Mix well and pour over the batter in the pan. Take a knife and zig zag through the batter to give it a marbled effect. Bake at 350F for 30-40 minutes.
Carmel Icing
1 stick butter( no substitutes, sorry)
1c. brown sugar
1/4c. cream
1 tsp vanilla
powdered sugar
In a heavy sauce pot bring the butter and sugar to a boil, stirring constantly to avoid burning, for 2 minutes. Remove from heat; add cream and mix well, return to boil( stirring) for 1 more minute, let cool. Add vanilla and enough powdered sugar to spreadable consistency .
Sunday, January 30, 2011
Cabbage buns how to.......

The last of the "Cinderella Pumpkin" and "Late Dutch Cabbage" from the root cellar. The cabbage has been in storage for 6 months and when in storage for this long, the color tends to fade from the leaves, although it keeps the same crisp texture and flavor, after.................

You peel away the dehydrate and thin leaves, so as time progresses, the original head will be smaller, after you peel away the outer dried and thinned leaves

The head with all dried and thinned leaves peel away, it still weighs 8-10lbs. The leaves taken off will be fed to the chickens, they love them!

All chopped and ready to be added to the browned burger. The burger is browned with onions, lots of minced garlic( we love it!), sea salt and pepper. Then the cabbage is added with about 1/3 c of water to steam over low heat. While this is steaming, we move onto making our whole wheat bread dough.

The recipe for this bread dough is found here.


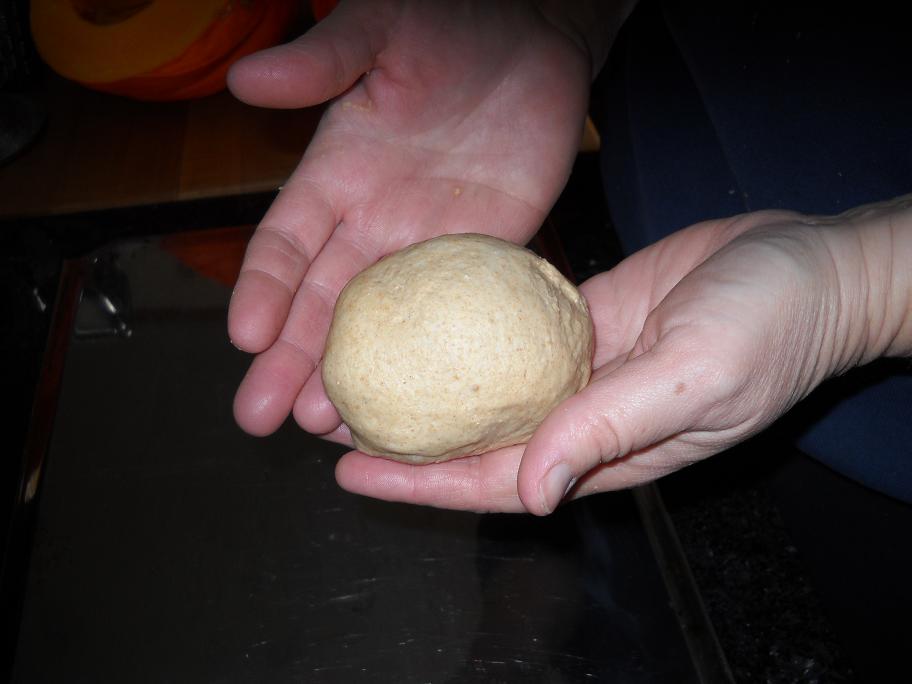


Now give it a try, you won't be disappointed :o) Be creative you can also substitute a loose sausage, maybe spicy *wink* Sometimes if I have cooked brown rice on hand I'll add 1 cup or so of that too. :o)
Just makes them more hearty and filling. Enjoy!
Thursday, December 9, 2010
We wanted to share some of our favorite Christmas goodie recipes that we posted last Dec. here and here . We're busy trying to get some of our Christmas crafts started and now finished in time, the clock is ticking you know!
When thinking of items, we always take into account what we have on hand, before buying anything. Well.... while in the library the other day I found this book ; Since we have dried gourd just hanging around, I thought I'd look into it. I was amazed at the ideas and projects they had inside. I'm only sharing one picture of ornaments made with gourds, the rest of the pictures will come from our projects so we don't get into a copyright hassle. ( see ornaments below)


We're also working on several other crafts and ideas , which we'll share as soon as we get each item completed.
We need more hours in a day, the time just seems to fly right by and before we know it it's time for bed again*sigh*
May your days coming to Christmas be blessed and stress free! *wink*
When thinking of items, we always take into account what we have on hand, before buying anything. Well.... while in the library the other day I found this book ; Since we have dried gourd just hanging around, I thought I'd look into it. I was amazed at the ideas and projects they had inside. I'm only sharing one picture of ornaments made with gourds, the rest of the pictures will come from our projects so we don't get into a copyright hassle. ( see ornaments below)


We're also working on several other crafts and ideas , which we'll share as soon as we get each item completed.
We need more hours in a day, the time just seems to fly right by and before we know it it's time for bed again*sigh*
May your days coming to Christmas be blessed and stress free! *wink*
Saturday, September 25, 2010
After supper play time and What was for supper?


There is no recipe, it's one of those throw it together with whatever you have dishes*wink*
I threw in; 1-1/2 lbs loose style Italian sausage
Green onions
Garlic(minced)
Green pepper
Sweet basil( dry, approx. 1/2 tsp.)
Fresh rosemary( 3 small sprigs, minced)
Fresh Parcel(minced)
Shredded carrots
Thin sliced zucchini
I browned the sausage, added approx. 1Tbsp of olive oil, then added onions, potatoes, green pepper and herbs. I simmered this; stirring every so often, when potatoes were still crisp but softening, I added the shredded carrots, added a lid and lowered the flame. This simmered( I stirred it a couple of times) for approx. 12-15 minutes, or until potatoes and carrots were soft. I then added the zucchini slices over the top, replaced the lid and turned off the heat and let it sit for 10 minutes. It was a HUGE hit! We also had fried eggplant on the side.*wink*
This and that...
This is one batch of each; of the Plum Butter(left) and Plum Jelly(right)
The recipe is shared on yesterday's post.

A mix and match of assorted, end of the garden veggies.


spicier sauce.

6- half gallon canning jars below .......

All American canners and have decided they really only NEED one. Plus,
if by chance they may need to borrow it back I assured them we'd loan it to
them. :o)
I am going to take it to the Extension Office in the city and have the gauge tested,
it's a free service. If it needs to be replace we'll replace it. :o)

Blessings for your weekend.
Wednesday, August 4, 2010
We're still here and wanted to quickly share....
I haven't a lot of time these days, trying to keep up with pasture irrigation, the garden( weeding, watering and harvesting), regular chores( animals, house, cooking, errands, etc....) but we are getting a large supply of zucchini now( made a mistake and planted zucchin seed instead of Little Dumpling squash, now we have eight zucchin plants, YIKES!, LOL) and wanted to share some ways to enjoy it and preserve it for future use.
Zucchini casserole
This is a recipe my Mom always made and is a favorite, either as a side dish or an meal in itself.
3-4 medium zucchini
1 large onion
2-3 cloves minced garlic( we like garlic, this can be omitted or decreased)
2 large tomatoes( sliced into 1/4" slices) or 15 or so cherry tomatoes, sliced in half
2-3 c.shredded cheddar and monterey jack cheese, or even a pepper jack is very good!
1lb bacon or a good flavored loose sausage( cooked) works well too
Cut the bacon into bite sized pieces and begin cooking on low heat, you want it cooked but not crispy. Add onions and garlic and continue to cook on low until onions are tender.
While bacon, onions and garlic are cooking slice the zucchini into 1/4" thick or maybe a bit thicker slices, do your tomatoes at this time as well.
Lightly grease a lasagna sized dish and place a layer of zucchini slices, overlapping a bit, now take half the amount of the bacon mixture and sprinkle over these, now add a layer of tomato slices and top with half the amount of cheese, repeat the layering, ending with cheese. Now bake this in a slow oven, covered with foil( 275 to 300F) for approx 20-25 minutes. Remove from oven and let cool for 10 minutes before serving. Enjoy!
We also grate zucchini and freeze it in 2c. amounts for making zucchini bread or cake. You can also slice it a bit thicker than 1/4" and dehydrate for later use in soups and casseroles. We also like the dehydrated zucchini, soaked in salt water first( for an hour) and sprinkled, (before dehydrating) with a french fry season mix we buy and eat them as a substitute for potato chips.
BTW, I've been following a blog for some time now, a fellow homesteader. They refer to themselves as Modern Day Rednecks, but are nothing like some of the Redneck jokes I've seen or heard. This family is hard working and building up a nice homestead on a very frugal budget. Their blog has a wonderful picture story of the farm's growth( especially building their mini barn) and just recently were blessed with goats, miniature horses, a dog and..... well, you go take a look for yourself I know you'll enjoy your tour on Modern Day Redneck.
Zucchini casserole
This is a recipe my Mom always made and is a favorite, either as a side dish or an meal in itself.
3-4 medium zucchini
1 large onion
2-3 cloves minced garlic( we like garlic, this can be omitted or decreased)
2 large tomatoes( sliced into 1/4" slices) or 15 or so cherry tomatoes, sliced in half
2-3 c.shredded cheddar and monterey jack cheese, or even a pepper jack is very good!
1lb bacon or a good flavored loose sausage( cooked) works well too
Cut the bacon into bite sized pieces and begin cooking on low heat, you want it cooked but not crispy. Add onions and garlic and continue to cook on low until onions are tender.
While bacon, onions and garlic are cooking slice the zucchini into 1/4" thick or maybe a bit thicker slices, do your tomatoes at this time as well.
Lightly grease a lasagna sized dish and place a layer of zucchini slices, overlapping a bit, now take half the amount of the bacon mixture and sprinkle over these, now add a layer of tomato slices and top with half the amount of cheese, repeat the layering, ending with cheese. Now bake this in a slow oven, covered with foil( 275 to 300F) for approx 20-25 minutes. Remove from oven and let cool for 10 minutes before serving. Enjoy!
We also grate zucchini and freeze it in 2c. amounts for making zucchini bread or cake. You can also slice it a bit thicker than 1/4" and dehydrate for later use in soups and casseroles. We also like the dehydrated zucchini, soaked in salt water first( for an hour) and sprinkled, (before dehydrating) with a french fry season mix we buy and eat them as a substitute for potato chips.
BTW, I've been following a blog for some time now, a fellow homesteader. They refer to themselves as Modern Day Rednecks, but are nothing like some of the Redneck jokes I've seen or heard. This family is hard working and building up a nice homestead on a very frugal budget. Their blog has a wonderful picture story of the farm's growth( especially building their mini barn) and just recently were blessed with goats, miniature horses, a dog and..... well, you go take a look for yourself I know you'll enjoy your tour on Modern Day Redneck.
Wednesday, March 31, 2010
Seedling update and homemade chick food
Our tomatoes, early flat dutch cabbage and some flowers are already in need of re-potting.
 Top view of some of the tomatoes, we have them at various stages in prep for
ripening in the hoop house. Some of our favorite varieties are Determinate and some
are Indeterminate. Determinate means that the plant has a primary and a secondary
axis, producing a limited supply of fruit/ ripen at relatively same time frame.
Indeterminate has a central axis, growing, indefinitely in length, producing a
succession of lateral branches, bearing flower buds. Indeterminate will ripen
throughout the season.
 Top view of some of the tomatoes, we have them at various stages in prep for
ripening in the hoop house. Some of our favorite varieties are Determinate and some
are Indeterminate. Determinate means that the plant has a primary and a secondary
axis, producing a limited supply of fruit/ ripen at relatively same time frame.
Indeterminate has a central axis, growing, indefinitely in length, producing a
succession of lateral branches, bearing flower buds. Indeterminate will ripen
throughout the season.
 We'll work on re-potting in a week or so, depending on the weather and will
move them to our small outdoor greenhouse during the day and back in, in
the evenings, or we may hook up our milk house heater and leave them out.
 Many of our herbs have long germination times, but they are beginning to
fill in and grow well. We are however again struggling with our sweet and hot
peppers. The seed is viable, we check by sprouting some on a moist paper
towel. So I'm either over watering them or under watering*sigh* I've replanted
them for the second time and pray they sprout.
 As we've educated ourselves about GMO's and commercial animal feeds,
we've been on a path of making and mixing our own feeds. Today I'm grinding
our chick feed, this will supply a weeks worth of feed for the small chicks. As they
grow you'll need to increase your amounts Here is what we grind;
2c. organic barley
2c. organic oat groats
1-1/2 c. Painted Mountain Indian corn
2c. red winter wheat
1/2 c. organic flax seed
1/2 c organic sunflower seed
and to this I add;
3-4 Tbsp. granular garlic
2tsp. sea salt
4-5 Tbsp. Thorvin Kelp
1 tsp. of each herb listed; yarrow, oregano, rosemary and basil.
 Here is the Painter Mountain Indian corn, we grow each year for ourselves as
as well as for animal feed. Everything added and waiting to be mixed. It smells wonderful! Okay now
don't laugh, but..... it makes their poo smell better too, LOL! Mike even says it
smells like Italian something *wink* You can see the different textures in the grains, some I grind finer than
others for better absorption. They love it and we place a small plastic lid
full of sand and small grit in along with their food and water. We also
begin introducing grated up carrots, lettuce, squash, bread crumbs, etc...
This is when they learn to become beggars*wink*
Sunday, January 31, 2010
Basic Country Sausage
10lbs of pork and 2lbs of fat
2 Tbsp. salt
4tsp. ground sage
4tsp. black pepper
1 tsp. majoram
1 tsp. dry mustard
Mix ingredients together and add to coarse ground meat, then grind
through on medium plate. Refrigerate overnight to let spices blend
with meat.
Spicy Sausage
10lbs of meat to 2lbs fat
6 1/2 tsp sage
2-1/2 tsp. ground cloves
3-5 cloves minced garlic
3 tsp. fennel
5 tsp. black pepper
2-1/2 tsp. dry mustard.
We only add 1-2 tsp. cayenne pepper to this recipe to
make our "Spicy Sausage". However we don't like really HOT
sausage, so I toned this down from 3-5 tsp. cayenne, so experiment
for your taste. You mix as in the recipe above, then refrigerate
overnight to let spices blend with meat, wrap and freeze.
Breakfast Sausage
10lbs meat to 2lbs fat
6 tsp. salt
3-1/2 Tblsp sage
4 tsp. black pepper
3 tsp. brown sugar
3 tsp. paprika
1 tsp. celery seed
1/4 tsp ground ginger
1/4 tsp. ground nutmeg
Mix together, add to coarse ground meat, grind through medium
plate, refrigerate overnight to let spices blend with meat, wrap and
freeze.
Enjoy! Remember just because you aren't butchering your own pig,
if a sale on pork roasts is good, buy 10lbs, ask the butcher for
fat and make you own sausage, then you know it's fresh and contains no MSG, which is the main ingredient in premixed sausage spice blends!
10lbs of pork and 2lbs of fat
2 Tbsp. salt
4tsp. ground sage
4tsp. black pepper
1 tsp. majoram
1 tsp. dry mustard
Mix ingredients together and add to coarse ground meat, then grind
through on medium plate. Refrigerate overnight to let spices blend
with meat.
Spicy Sausage
10lbs of meat to 2lbs fat
6 1/2 tsp sage
2-1/2 tsp. ground cloves
3-5 cloves minced garlic
3 tsp. fennel
5 tsp. black pepper
2-1/2 tsp. dry mustard.
We only add 1-2 tsp. cayenne pepper to this recipe to
make our "Spicy Sausage". However we don't like really HOT
sausage, so I toned this down from 3-5 tsp. cayenne, so experiment
for your taste. You mix as in the recipe above, then refrigerate
overnight to let spices blend with meat, wrap and freeze.
Breakfast Sausage
10lbs meat to 2lbs fat
6 tsp. salt
3-1/2 Tblsp sage
4 tsp. black pepper
3 tsp. brown sugar
3 tsp. paprika
1 tsp. celery seed
1/4 tsp ground ginger
1/4 tsp. ground nutmeg
Mix together, add to coarse ground meat, grind through medium
plate, refrigerate overnight to let spices blend with meat, wrap and
freeze.
Enjoy! Remember just because you aren't butchering your own pig,
if a sale on pork roasts is good, buy 10lbs, ask the butcher for
fat and make you own sausage, then you know it's fresh and contains no MSG, which is the main ingredient in premixed sausage spice blends!
Saturday, January 30, 2010
Yes, we're still making sausage! We had approx. 125+ lbs of meat for
sausage making.
 Here is our first batch of sausage, it was a new recipe so made
a small batch first. This was a recipe generously shared by a
friend( thanks Yukon Mike! ) from http://www.pioneerliving.net/
Let me tell you this is a recipe well worth sharing and I'm passing
the recipe on to you(below)
sausage making.
 Here is our first batch of sausage, it was a new recipe so made
a small batch first. This was a recipe generously shared by a
friend( thanks Yukon Mike! ) from http://www.pioneerliving.net/
Let me tell you this is a recipe well worth sharing and I'm passing
the recipe on to you(below)
 First is the coarse grinding of the meat and fat. Then mix in the
herbs and seasonings( only the salt,pepper, and Bay leaves weren't
raised on the farm)
 Second grinding using the medium plate.
 If you click on the photo, you can see some of the seasonings,
now well mixed in. Next step, the most important, see below... Taste testing and if there needs to be some adjustments,
then you sample it again, until you have the flavor just right.
This recipe didn't need much adjusting, we simply added
more garlic and red pepper, to suit our tastes.
Here are the recipes we use, all are our favorites!
Italian Sausage
2 lb. pork
1/2 lb. fat
1 Tbsp. fennel(ground)
2 bay leaves(ground)
1 Tbsp. dry parsley
1 tsp. garlic powder or 3-4 cloves minced
1/4 tsp red pepper flakes
2 tsp. salt
2-3 tsp. black pepper( two for a less pepper flavor)
4 tsp. water
In large bowl mix all ingredients( meat coarse ground), until thoroughly mixed. Run through the medium grinder plate. Refrigerate overnight to let meat and spices blend. Makes enough for 3-4 pizzas.
More recipes to come... but supper is first*wink*
Monday, December 7, 2009
Noodle making tutorial
Reminder, you can click on the photos to see full size version.
I remember how long I saved for this wonderful kitchen tool! Now as you'll see below it only cost $39.99, but that was a closeout price, if memory serves me regular price was $79.99. Back in 1994 that was a considerable purchase for the kitchen.
 Yes, I keep receipts, it's fun to look back to see when you bought something and how much you paid for it.
 It has attachments, such as this one that came with the machine. It makes egg noodles( on the left side) and spaghetti noodles( on the right). I also have an angel hair cutter, as lasagna noodle cutter, a ravioli attachment and all of these were purchased at a garage sale several years later, for $20 total. The ravioli maker is messy to use, so I make them by hand, but use the roller to roll the noodle dough thin enough.
 This knob is on the roller unit and it is numbered from 1-7. This controls the thickness of the dough.

 Here is what came in the box. This machine is NEVER to be washed, only wiped down with a damp cloth and dried right away. If pasta dough should get stuck in the cutter, let it dry and then brush out.
Now to share our noodle dough recipe;
Basic Pasta Dough
2-1/4 to 2-1/2 c. flour( we use half unbleached and half
whole wheat)
1/3c. water or broth
2 eggs
1 egg yolk
1Tbsp. olive oil
1tsp. salt
Combine in given order, mix for 2 minutes.
with a wooden spoon mix in enough flour to make a soft
dough. Turn out onto a lightly floured surface, kneading
about 10 minutes. Cover and let it for rest for 30 minutes.
Roll to desired thickness and cut( this is where you use
the pasta machine.)
 Here is what it looks like after resting.
 Pull off a ball, double the size of a golf ball and flatten
 set your thickness dial on #1 and roll through. If dough is sticky, dust with flour and run through roller on setting #1.
 Fold the ends toward the center and roll through again on setting #1( see
picture below)
I remember how long I saved for this wonderful kitchen tool! Now as you'll see below it only cost $39.99, but that was a closeout price, if memory serves me regular price was $79.99. Back in 1994 that was a considerable purchase for the kitchen.
 Yes, I keep receipts, it's fun to look back to see when you bought something and how much you paid for it.
 It has attachments, such as this one that came with the machine. It makes egg noodles( on the left side) and spaghetti noodles( on the right). I also have an angel hair cutter, as lasagna noodle cutter, a ravioli attachment and all of these were purchased at a garage sale several years later, for $20 total. The ravioli maker is messy to use, so I make them by hand, but use the roller to roll the noodle dough thin enough.
 This knob is on the roller unit and it is numbered from 1-7. This controls the thickness of the dough.
 Here is what came in the box. This machine is NEVER to be washed, only wiped down with a damp cloth and dried right away. If pasta dough should get stuck in the cutter, let it dry and then brush out.
Now to share our noodle dough recipe;
Basic Pasta Dough
2-1/4 to 2-1/2 c. flour( we use half unbleached and half
whole wheat)
1/3c. water or broth
2 eggs
1 egg yolk
1Tbsp. olive oil
1tsp. salt
Combine in given order, mix for 2 minutes.
with a wooden spoon mix in enough flour to make a soft
dough. Turn out onto a lightly floured surface, kneading
about 10 minutes. Cover and let it for rest for 30 minutes.
Roll to desired thickness and cut( this is where you use
the pasta machine.)
 Here is what it looks like after resting.
 Pull off a ball, double the size of a golf ball and flatten
 set your thickness dial on #1 and roll through. If dough is sticky, dust with flour and run through roller on setting #1.
 Fold the ends toward the center and roll through again on setting #1( see
picture below)

 This is what it looks like now. If sticky, rub with small amount of flour and.....
 ......fold the ends to the center again( opposite how it was folded the first time). Roll through on #1 setting, then move setting to #2, roll through and continue through to the #4 setting.
 Dust with flour and rub in( see below), both sides of dough.
 Now the dough is ready to run through the cutter, just move the handle.....
 .... to the cutter position. Now gently feed the end into cutter as you crank the handle.
 WOW! noodles, homemade from scratch! Gently guide the cut noodles with your free hand, so they stay nice, not in a heap.
 Lay the noodles out, now decide the length noodle desired and cut with scissors. You will have to pull apart the noodles as you add them to your boiling soup, stirring occasionally to keep noodles from sticking together.
 In approx. 1 hour from start to finish you can have homemade noodles. This happens to be Turkey Noodle Soup, from leftover Thanksgiving turkey. Mmmmm, Mmmmm.
You can also substitute in spinach puree, tomato puree, etc....(be creative!) for the 1/3c. water or broth. You may also freeze these noodles, just lay out, or hang( backs of kitchen chairs work well) and let dry, about 50% then bag and freeze. You may also dry completely and store in glass jars in a cool dry place.
You also don't have to have a pasta machine, simply roll dough out by hand to desired thickness, dust and rub well with flour, fold in half and cut into desied widths with a sharp knife( I did it this way for years before the machine)
For raviolis, roll to desired thickness, cut( I use a shot glass), place 1-2 tsp filling( meat of cheese) add another round dough piece on top of filling and seal with a fork around the edges. These freeze well. Enjoy!
Subscribe to:
Posts (Atom)
